Muser Apac Sdn Bhd added new photo in PCE Instruments - Endoscope
Feb 9, 2024 at 11:50 am —
PCE-VE 270HR Videoscope | PCE Instruments by Muser

PCE-VE 270HR Videoscope | PCE Instruments by Muser

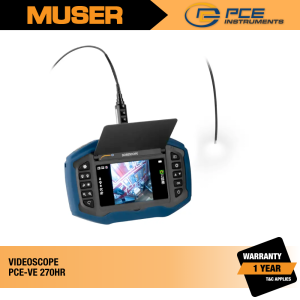
PCE Instruments PCE-VE 270HR Videoscope     Features 2 m / 6.56 ft cable length 2.8 mm / 0.11 in cable diameter Storage function on micro SD card LED light 0° viewing angle Miniature probe cable with 90° viewing angle option     Description   The inspection camera gives you new, visual insights into the interior of motors and systems. The inspection camera is the ideal tool for maintenance and repair in workshops or industrial companies. Optical analysis with an inspection camera has never been so easy. Guide the flexible cable through a hole or a cavity near the point to be inspected and look at everything on the display from the inspection camera. Thanks to the flexible guidance, the low weight and the excellent optics, you can use this inspection camera to identify weak spots and problem areas very easily and early and thus take preventive measures without having to carry out complex disassembly first.    This inspection camera is extremely versatile, particularly due to the length of the flexible part (2000 mm) and the small diameter of 2.8 mm / 0.11 in. LEDs on the inspection camera illuminate the cavities. The waterproof lens and camera can also be used in liquids without hesitation. Make your daily work easier and use the inspection camera for the maintenance and inspection of your operational systems and machines. The inspection camera can be used to save images and videos for documentation on a memory card. The inspection camera can be connected to a monitor via the HDMI interface.     Technical Specifications   Cable length 2 m / 6.56 ft Cable type Flexible Cable diameter 2.8 mm / 0.11 inch Degree of protection IP 67 Field of view 5 ... 50 mm / 0.2 ... 1.98 in Field of vision 120° Perspective 0° Lighting 4 LEDs Exposure Automatically Anti-reflective coating Automatically Image sensor 1/18'' CMOS Camera resolution / image sensor      400 x 400 px Display 5'' TFT screen Interface Micro USB, HDMI Storage option Image and video Storage Micro SD memory card Picture format JPEG (400 x 400 Px) Video format MP4 (400 x 400 Px) Video output HDMI Menu navigation German, English, Chinese, Spanish, Portuguese, French, Russian, Japanese, Korean Operating and storage temperature -10 ... 50°C / 14 ... 122°F Power supply 3.7 V Li-ion battery, 5200-mAh Battery life Min. 6 h Dimensions 200 x 130 x 58 mm / 7.9 x 5.1 x 2.3 inch Weight 595 g / 1.3 lb     Delivery Scope 1 x Videoscope PCE-VE 270HR 1 x Carrying case 1 x Charger 1 x HDMI cable 1 x Micro USB cable 1 x Stand 1 x Instructions     Downloads Product Datasheet User Manual     Product Video               read more
Muser Apac Sdn Bhd added new photo in PCE Instruments - Vibration
Feb 9, 2024 at 10:47 am —
PCE-VT 3700 Vibration Meter | PCE Instruments by Muser

PCE-VT 3700 Vibration Meter | PCE Instruments by Muser

PCE Instruments PCE-VT 3700 Vibration Meter     Features Automatic ISO 10816-3 evaluation Easy to handle For mobile vibration measurement The measurement unit can be switched between the metric system and imperial units. Coloured graphic display Peak-hold function     Description   The vibration meter is ideal for maintenance workers to quickly check vibrating parts, machines and systems. This vibration meter shows the vibration acceleration, vibration velocity and vibration displacement directly on the display. You can use the device to quickly and reliably detect machine imbalances which can lead to, for example, bearing damage. The vibration meter is equipped with a mode that allows a measurement according to ISO 10816-3 to be carried out. The vibration meter analyses the measured values and automatically shows a good / bad evaluation on the display.   The vibration meter is supplied with a sensor on the spiral cable, magnet adapter, service bag and batteries. The ISO factory certificate completes the scope of delivery. The display of the vibration meter is a coloured graphic display, which makes operation easier, since all instructions and menu items are shown in plain text. The 12 languages in the menu of the vibration meter are easily switchable.     Technical Specifications   Measuring range   Acceleration 0.0 - 399.9 m/s² / 0.0 - 15744 in/s² Resolution 0.1 m/s² / 3.94 in/s² Accuracy @ 160 Hz ±2 % Frequency range   1 kHz - 10 kHz 10 Hz - 10 kHz Measuring range   Velocity 0.00 - 399.99 mm/s / 0.00 - 15.74 in/s Resolution 0.01 mm/s / 0.0039 in/s Accuracy @ 160 Hz ±2 % Frequency range 10 Hz - 1 kHz Measuring range Displacement   0.000 - 3.999 mm / 0.000 - 0.154 in Resolution 1 µm / 39.4 µin Accuracy @ 160 Hz ±2 % Frequency range 10 Hz - 200 Hz Measurement parameters   RMS, Peak, Peak-Peak Crest factor Units switchable metric / imperial Display 2.8'' LC display Menu languages       English, German, French Spanish, Italian, Dutch Portuguese, Turkish, Polish Russian, Chinese, Japanese Power supply 3 x 1.5 V AA batteries Operating and storage conditions -20 ... +65 °C / -4 ... 149 °F; 10 ... 95 % r.H. Dimensions 165 x 85 x 32 mm / 6.4 x 3.3 x 1.2'' Weight 239 g / 8,4 oz Technical Data Vibration Sensor Resonance frequency 24 kHz Transverse sensitivity ≤ 5% Destruction limit 5000 g (peak) Operating and storage temperature   -55 ... +150 °C / -67 ... 302 °F Housing material stainless steel Mounting thread ¼ - 28“ Dimensions Ø 17 x 46 mm / 0.67 x 1.8'' Weight (without cable) 52 g / 1.8 oz Protection Class: IP52     Delivery Scope 1 x Vibration Meter PCE-VT 3700 1 x Sensor with spiral cable PCE-VT 3xxx SENSOR 1 x Magnet adapter PCE-VT VMH 3 x 1.5 V AA batteries 1 x Quickstart guide 1 x Service bag     Downloads Product Datasheet User Manual     read more
Muser Apac Sdn Bhd added new photo in PCE Instruments - Hardness
Feb 7, 2024 at 11:48 am —
PCE-2000N Metal Hardness Tester | PCE Instruments by Muser

PCE-2000N Metal Hardness Tester | PCE Instruments by Muser

PCE Instruments PCE-2000N Metal Hardness Tester     Features Measures all common hardness parameters External impact device on 1.5 m / 4.9 ft cable Large measuring range High precision Storage data measurements on USB stick Various other impactors as accessories Measurement in different angles possible Colour display     Description   The PCE-Instruments PCE-2000N hardness meter uses the Leeb rebound method. This is a dynamic hardness test method in which a standardized test specimen, usually a hard metal ball, is hit with defined impact energy on a test surface. The impact of the hard metal ball on the test surface results in a plastic deformation of the surface at the point of impact. From this deformation results in an energy loss, which is proportional to the workpiece hardness and can be determined by the ratio of rebound to impact velocity of the specimen.    This technology enables a compact design, which makes it particularly suitable for the hardness tester. In contrast to static test methods with heavy hardness testing machines, a mobile hardness tester can be used very flexibly in the incoming or outgoing inspection, in production and generally in all areas where hardness has an influence on quality parameters. The hardness tester from PCE Instruments can be used to measure six different hardness scales (HL, HV, HRA, HRC, HB, HV, HS) as well as ten different materials.   As standard, the hardness meter is supplied with a striker D, but optional additional impactors (DC, DL, C, D + 15, E, G) can be connected for more specific applications. In addition, the data can be saved directly on a USB stick, which further extends the flexibility of this mobile hardness tester. With a highly readable OLED display, a long standby time, a handy housing and a symbol-based menu navigation, the handling of the mobile hardness tester is extremely user-friendly.     Technical Specifications   Measuring ranges 170 ... 960 HLD 17.9 ... 69.5 HRC 19 ... 683 HB 80 ... 1042 HV 30.6 ... 102.6 HS 59.1 ... 88 HRA 13.5. .. 101.7 HRB     Impact device included (optional impact devices) D (DC, D + 15, C, G, DL)     Cable length impact device About 1.5 m / 4.9 ft Accuracy ± 0.5% (@ 800 HLD) Repeatability 0.8% (@ 800 HLD)     Hardness scales HL (Leeb) HV (Vickers) HB (Brinell) HS (Shore) HRA (Rockwell A) HRB (Rockwell B) HRC (Rockwell C)     Measurable materials Steel Cast steel Alloy steel Stainless steel Gray glacé Ductile iron Cast aluminum alloy Cu-zinc (brass) Copper-tin alloy, Copper     Display resolution 128 x 64 pixel OLED Data storage 600 averages in 6 data groups Data output USB stick Power supply 3 x AA 1,5V-batteries Auto Power-Off if not in use, the device shuts off automatically after 12 minutes Operating conditions 10 ... 50°C / 50 ... 122°F, 20 ... 90% rh Storage conditions -30 ... 60°C / -22 ... 140°F Dimensions 160 x 80 x 40 mm / 6.3 x 3.1 x 1.6 in (H x W x D) Weight Measuring device with batteries: approx. 300 g / < 1 lb Impact device : approx. 75 g / < 1 lb     Material   Steel / cold rolled steel HRA 59.1 ... 85.8 HRC 20 ... 68.5 HRB 38.4 ... 99.6 HB 127 ... 651 HSD 32.2 ... 99.5 HV 83 ... 976 Alloyed tool steel HRC 20.4 ... 67.1 HV 80 ... 898 Stainless steel HRB 46.5 ... 101.7 HB 85 ... 655 HV 85 ... 802 Cast iron HB 93 ... 334 Ductile iron HB 131 ... 387 Cast aluminum HRB 23.8 ... 84.6 HB 19 ... 164 Brass HRB 13.5 ... 95.3 HB 40 ... 173 Bronze HB 60 ... 290 Copper HB 45 ... 315     Delivery Scope 1 x Hardness tester PCE-2000N 1 x Hardness comparison block 1 x Striker type D 1 x Transport case 1 x Cleaning brush 1 x User manual 3 x AA 1,5V-batteries 2 x Stabilization ring 1 x 2 GB USB stick     Downloads User Manual     Product Video           read more
Muser Apac Sdn Bhd added new photo in PCE Instruments - Hardness
Feb 5, 2024 at 10:03 am —
PCE-900 Metal Hardness Tester | PCE Instruments by Muser

PCE-900 Metal Hardness Tester | PCE Instruments by Muser

PCE Instruments PCE-900 Metal Hardness Tester     Features Hardness test by the rebound method 9 material presets Easy to handle Data interface Six different hardness scales     Description   The Leeb Hardness Tester PCE-900 measures the hardness of nine different metals using the Leeb rebound method. This means that with the hardness tester a firing pin bounces on a metallic surface and the intensity of the rebound is used as an indicator of the material hardness. The hardness tester PCE-900 measures the metal hardness in 6 different hardness scales, including: Rockwell, Vickers, Leeb, Brinell and Shore. A distinction is made between Rockwell B and C when measuring in the Rockwell scale.    The Leeb hardness tester PCE-900 comes with a type D impact probe as standard. This probe can be used for many measurements. Via the optional software, the measured values can be transmitted live to the PC. This makes the PCE-900 Leeb hardness tester an important instrument in the field of material inspection in goods control.      Technical Specifications   Measuring range 200 ... 900 HL Measuring accuracy ± 0.8% at HLD=900 Materials 9 common material presets  Hardness scales Leeb: HL Rockwell C: HRC Rockwell B: HRB Brinell: HB Vickers: HV Shore: HSD Display 12.5 mm / 0.5'' LCD with backlight Impact probe Type D Memory 50 data sets Interface RS-232 Power supply 4 x 1.5V AAA batteries Environmental conditions     Operating temperature: -10 ... 50°C / 14 ... 122°F Storage temperature: -30 ... 60°C / -22 ... 140°F Relative humidity: < 90% Dimensions 142 x 77 x 40 mm / 5.59 x 3.03 x 1.58 in Weight Device weight: ca. 130 g / < 1 lb Probe weight: 75 g / < 1 lb Cable length ca. 1.2 m / 3.9 ft     Downloads Product Datasheet User Manual     Product Video           read more
Muser Apac Sdn Bhd added new photo in PCE Instruments - Thickness
Jan 31, 2024 at 11:56 pm —
PCE-TG 150 Material Thickness Gauge | PCE Instruments by Muser

PCE-TG 150 Material Thickness Gauge | PCE Instruments by Muser

PCE Instruments PCE-TG 150 Material Thickness Gauge     Features Measured value memory Calibration reference on the housing Automatic shutdown Material thickness measurement up to 300 mm / 11.81'' Battery status indicator Optionally with ISO calibration certificate     Description   The thickness gauge can measure material thicknesses up to 300 mm / 11.81''. So that the material thickness of a wide variety of homogeneous materials can be measured, it is possible to store the corresponding speed of sound in the thickness gauge. For materials such as steel, aluminum, zinc, silver and gold, the appropriate sound speeds are already stored in the device library. This means that the thickness gauge can be used universally. With the limit value function in the thickness gauge, individual maximum and minimum values ​​can be stored. If the measured value of the test piece is outside the limits, the thickness gauge signals this visually. If necessary, the signaling can also be done acoustically by the thickness gauge in addition to the visual display. This is why the thickness gauge is used, for example, in quality assurance and in incoming goods inspections. The thickness gauge has a data memory on which the measured values ​​can be recorded. After a measurement sequence, the stored measurement values ​​can be analyzed directly on the thickness gauge. The stored data are graphically displayed by the thickness gauge. In addition, each individual measuring point can be approached and read in the graphics of the thickness gauge. For a simplified analysis of the measured values, the average, the largest and smallest measured value is displayed on the thickness gauge. The thickness gauge can optionally be equipped with an ISO calibration certificate.     Technical Specifications   Measuring range 1.00 ... 300.0 mm  / 0.04 ... 11.81'' Resolution   0.01 mm at ≤99.99 mm 0.1 mm at ≥100.0 mm Accuracy ±0.5 % of measured value + 0.05 mm Storage space 1500 measured values Probe frequency 5 MHz / 2.5 MHz Standard sensor Sensor PCE-TG 5M10d     Further specifications   Adjustable speed of sound   1000 ... 9999 m/s Smallest pipe diameter Ø20 x 3 mm (steel) Material library 15 memory locations Calibration reference 4 mm Display 2.4 inch TFT LCD color display with brightness adjustment Power supply 3 x 1.5 V AA batteries Automatic switch-off switched off, 2, 5, 10, 30 minutes Ambient conditions 0 ... 40 °C / 32 ... 104 °F, <90 % RH, non-condensing Dimensions 163 x 82 x 38 mm / 6.4 x 3.2 x 1.5'' Weight 320 g / 11.2 oz     Delivery Scope 1 x Thickness Gauge PCE-TG 150 1 x Sensor PCE-TG 5M10d 1 x Coupling gel (TT-GEL) 1 x Transport bag 3 x 1.5 V AA batteries 1 x Quick start guide     Downloads Product Datasheet User Manual   read more
Muser Apac Sdn Bhd added new photo in Hygiena - Indicator Organism Tests
Jan 30, 2024 at 11:36 am —
ILM050 InSite L. mono Glo | Hygiena by Muser

ILM050 InSite L. mono Glo | Hygiena by Muser

Hygiena ILM050 InSite® L. mono Glo   Target: L. monocytogenes | Certificate: AOAC-RI | Tests: 50     Description   InSite® L. mono Glo is an easy-to-use, self-contained, environmental sampling and screening test for Listeria species and Listeria monocytogenes (L. mono). Each device contains a chromogenic liquid media formulated with antibiotics, growth enhancers, and color-changing compounds specific to Listeria plus fluorescent compounds specific to Listeria monocytogenes. Plus, all InSite® test devices contain neutralizers in the wetting solution to help combat potential sanitizer side effects and improve sample collection. The two-step test changes color in the presence of Listeria species, while illumination with UV light reveals the presence of L.mono.     Key Benefits   Simplified Workflow Increase lab productivity with streamlined protocols Less hands-on time frees technician time for other lab work. Easy to Interpret Easily visible color interpretation A darker color mean more contamination is present, a measurement of cleanliness and product quality. Rapid Results Results in 24-48 hours Faster results means faster response to potential contamination and quicker product release.     Downloads Product Brochure Product Range: Environmental Monitoring Solutions Product Instructions     Product Video         read more
Muser Apac Sdn Bhd added new photo in PCE Instruments - Ultrasonic Flow
Jan 30, 2024 at 11:11 am —
PCE-TDS 200 M Ultrasonic Flow Meter | PCE Instruments by Muser

PCE-TDS 200 M Ultrasonic Flow Meter | PCE Instruments by Muser

PCE Instruments PCE-TDS 200 M Ultrasonic Flow Meter     Features Measuring range ±32 m/s USB-C interface for data transfer  Optional software for analysing the measured values Reproducibility ±0.5 % of measured value  Heat quantity measurement Data memory for 10 million measuring points Individually adjustable alarm limits Optionally with ISO or DAkkS calibration certificate     Description   Ultrasonic flow meter with 32 GB data memory / measuring range ±32 m/s / reproducibility ±0.5 % of measured value / different measuring probes / alarm limit values / 2.8 '' LC display / for all media / optionally with DAkkS or ISO calibration certificate   The ultrasonic flowmeter has a measuring range of ±32 m/s. With an accuracy of ±1.5 % f.s. for a pipe diameter of DN ≥50, ±3.5 % f.s. for a pipe diameter of DN <50 and a reproducibility of ±0.5 % f.s., the ultrasonic flow meter is a particularly precise measuring device. An installation aid is available for installing the sensors of the ultrasonic flow meter. The installation aid graphically displays the signal quality of the ultrasonic flow meter. In addition, it is graphically displayed whether the sensors of the ultrasonic flow meter are positioned at the correct distance from each other. To carry out flow measurements with the ultrasonic flow meter, the flow velocity, the volume flow and the volume are displayed after entering the pipe and medium specifications. The ultrasonic flow meter displays the measured values in a wide range of units. For example: m³, l, gal, igl, mgl, cf, bal, ib and ob.    During a measurement, it is possible to record the measured values via the data logger function of the ultrasonic flow meter. Start and stop conditions and the storage interval from 1 second to 12 hours can be set for the ultrasonic flow meter. A memory point of the ultrasonic flow meter contains all measured values once. The measured values are stored on the 32 GB built-in memory of the ultrasonic flow meter. 10 million measuring points can be stored on the ultrasonic flow meter.   With the optional software, the recorded measured values can be read out from the ultrasonic flow meter. For analysis, the measured values from the ultrasonic flow meter can be displayed in tabular and graphic form. For further processing of the measured values from the ultrasonic flow meter, they can be exported in .csv file format. Alternatively, a PDF report can be created via the software. For simplified operation, the ultrasonic flow meter can be set via the software. A live view of the measured values from the ultrasonic flow meter is also possible with the software.    In order to determine the amount of heat with the ultrasonic flow meter, two additional thermocouples are required. These are available with the PCE-TDS 200+. The two thermocouples of the ultrasonic flow meter are connected to the flow and return of a pipe system. Based on the temperature difference and the measured flow rate, the ultrasonic flow meter can determine the amount of heat. If required, the ultrasonic flow meter can calculate and display the costs per heat quantity unit simultaneously during the measurement. Thus, the ultrasonic flow meter is used, for example, in the inspection of heating systems.   The LC colour display of the ultrasonic flow meter has a size of 2.8'' and is therefore easy to read. Optionally, the ultrasonic flow meter can be equipped with an ISO or DAkkS calibration certificate.      PCE-TDS 200 M SENSOR   Medium sensor pair for pipe diameters DN 50 ... 700 / 57 ... 720 mm. Suitable for flow measurement on medium-sized pipes. The sensors of the ultrasonic flow meter can be attached to ferrous pipes with the built-in magnets. Alternatively, the sensors can be mounted to the pipe with detachable cable ties. The temperature resistance is between -30 ... 160 °C.     Technical Specifications   Flow measurement   Measuring range ±32 m/s Accuracy 0,001 m/s Genauigkeit DN ≥50 mm: ±1.5 % rdg. for velocities > 0.3 m/s   DN <50 mm: ±3.5 % rdg. for velocities > 0.3 m/s Reproducibility ±0.5 % of measured value   PCE-TDS 200 M SENSOR Sensor pair Pipe diameter DN 50 ... 700 / 57 ... 720 mm  Temperature resistance -30 ... 160 °C   Measuring method Z, V, N, W Medium                   - water - sea water - oil - crude oil - methanol - ethanol - diesel - petrol - petroleum - user defined (manual input of the sound velocity from the medium)   All liquids with an impurity <5 % Pipe material                               - copper CU - steel FE - stainless steel VA - aluminium AL - brass ME - cast iron CI - iron FE - nickel NI - titanium TI - zink ZI - acrylic AC - polyethylene PE - polypropylene PP - polyvinyl chloride PVC - nylon NY - user defined (manual input of the transversal sound velocity of the pipe material)   Inner pipe lining                       - no lining - user defined - epoxy resin - rubber - mortar - polystyrene PS - polyethylene PE - polytetrafluoroethylene PTFE - polyurethane PU - polypropylene PP - user defined (manual input of the longitudinal sound velocity of the inner lining of the pipe)   Measurement parameters flow velocity, volume flow and volume Units (dimensions) mm, in Units (flow velocity) m/s, ft/s Units (volume flow) m³, l, gal, igl, mgl, cf, bal, ib, ob Time specification seconds, minutes, hours, days Units (volume) m³, l, gal, igl, mgl, cf, bal, ib, ob   Further specifications   2.8'' LCD 2,8“ LCD Menu metric / imperial Menu languages German, English, French, Spanish, Italian, Dutch, Portuguese, Danish, Turkish, Polish, Russian, Chinese, Japanese Operating and storage conditions    Temperature: -20 ... +65 °C Humidity: 10 ... 95 % r. h., non-condensing Data logger 32 GB memory capacity / 10 million measuring points Interface USB (for online measurement, readout of the internal memory and for recharging the battery) Protection class IP52 Power supply Internal   Internal: LiPo battery (3.7 V, 2500 mAh) External: USB 5 VDC, 500 mA Operating time approx. 10 h Dimensions 165 x 85 x 32 mm Weight 255 g     Delivery Scope 1 x Ultrasonic flow meter PCE-TDS 200 M 1 x flow sensor PCE-TDS 200 M SENSOR (pair) 2 x 5 m connection cable  2 x detachable cable ties 1 x power supply unit 1 x USB-C cable 1 x ultrasonic contact gel  1 x PCE measuring tape 1 x plastic case 1 x instruction manual     Downloads Product Brochure Product Datasheet Product News User Manual Software Manual     read more
Muser Apac Sdn Bhd added 2 new photos in PCE Instruments - Microscope
Jan 30, 2024 at 10:13 am —
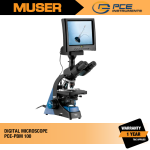
PCE-PBM 100 Digital Microscope | PCE Instruments by Muser
PCE-LCM 50 Digital Inspection Microscope | PCE Instruments by Muser
Muser Apac Sdn Bhd added new photo in PCE Instruments - Lux / UVA
Jan 30, 2024 at 09:38 am —
PCE-UV 40A Lux Meter for UVA and Visible Light | PCE Instruments by Muser

PCE-UV 40A Lux Meter for UVA and Visible Light | PCE Instruments by Muser

PCE Instruments PCE-UV 40A Lux Meter for UVA and Visible Light     Features Two-channel measuring device UV-A and visible light External sensor Simultaneous measurement Two UV-A measuring ranges up to 100 W/m² Control of UV lights for material testing Automatic measuring range changeover 0 lx ... 10 klx Accurate measurement of illuminance regardless of lamp type Measured value memory     Description   The light measuring device / lux meter is a highly developed instrument that is characterized by its versatility and precision. With its dual measurement channels, the light measuring device / lux meter enables the simultaneous measurement of UV-A radiation and visible light. This UVA meter feature is particularly useful for applications that require comprehensive light characterization. The external sensor allows the light measuring device / lux meter to be positioned flexibly to carry out precise measurements in different locations. This function is helpful, for example, when measuring UV lights for material testing according to the standards “EN ISO 9934-1 Non-destructive testing with magnetic powder” and “EN ISO 3059 Non-destructive testing, penetrant testing and magnetic particle testing” where precise UVA measurement is crucial. The precise measurements ensure reliable monitoring and quality assurance when processing UV-sensitive materials. The ability to store data makes the device particularly user-friendly. Users can easily record and analyze measurement results to monitor long-term trends or document quality checks. Overall, the UV/light meter offers a comprehensive solution for applications that require precise measurement of UV-A radiation and visible light. With its advanced features and simultaneous measurement capability, it is an indispensable tool for areas such as material testing, tanning bed control and workplace lighting control.     Technical Specifications   Light   Measuring range 0 lx ... 10 klx Resolution 0.1 lx Accuracy f1 ≤ 3%     UV   Measuring range 0 W/m² ... +100 W/m² Resolution 0.01W/m² Accuracy According to EN ISO 3059 V(λ) CIE ∆λ1/10 320 – 395nm ∆λ1/2 337 – 385nm λmax 365nm Sλ=313nm < 5% Sλ=405nm < 0.5%     General technical data   Display type LCD with lighting Storage medium Internal memory Storage capacity 20 records interface Mini USB Norm(s) ISO/CIE 19476, EN ISO 3059, EN ISO 9934 Measuring rate 1Hz Menu language English, Polish Protection class (device) IP20 Weight 148g / 0.3 lbs Device weight with scope of delivery 1198g / 2.6 lbs Device weight including scope of delivery and outer packaging   1377g / 3 lbs Dimensions (L x W x H) 118 x 72 x 20 mm / 4.6 x 2.8 x 0.8 in  Other dimensions Probe Ø44 x 25.5 mm Cable length probe 1.5 m / 4.9 ft Extension rod 460 mm / 18.1 in Operating conditions -10 ... 50°C / 14 ... 122°F, 0 ... 90% RH Storage conditions -10 ... 50°C / 14 ... 122°F, 0 ... 80% RH Languages ​​of the instructions English     Delivery Scope 1 x Light meter / lux meter PCE-UV 40A 1 x UVA / Lux sensor 1 x Sensor Holder 1 x Extension rod short to the sensor holder 1 x Transport case 1 x User Manual   read more
Muser Apac Sdn Bhd added new photo in PCE Instruments - Force / Tension
Jan 16, 2024 at 10:24 am —
PCE-BTM 2000A Belt Tension Meter | PCE Instruments by Muser

PCE-BTM 2000A Belt Tension Meter | PCE Instruments by Muser

PCE Instruments PCE-BTM 2000A Belt Tension Meter     Features Measurement of the oscillation frequency of the drive belt Intuitive controls Calculation of the tension force Display of the belt tension in N 6 menu languages Memory for 750 measured values Sensor on gooseneck Input of belt length and belt mass     Description   Memory for 750 measured values / graphic display / easy operation / multilingual menu / measurement in Hz and N   The belt tension meter is an optically measuring maintenance tool for determining the belt tension force. This belt tension meter consists of a display device and a sensor head attached on a semi-flexible gooseneck. The advantage of the gooseneck is that the sensor head can be flexibly positioned. Due to the mobility of the gooseneck, the sensor can measure the strand force even in hard to reach places. The belt tension measuring device measures the belt tension (in Newton) and the belt frequency (in Hz) of the belt in the stationary state.   A small impulse on the belt is sufficient to set the belt vibrating. The belt tension meter measures with the sensor the natural frequency of the belt generated in this way and visualizes it on the display. The belt tension meter can directly determine the actual tension (in Newton / Pound Force) of the belt from the belt frequency combined with the optionally entered belt length and belt mass. However, entering this data is not necessarily required in order to carry out the measurements directly with the belt tension measuring device. The measurement units in the device can be switched between N (SI unit) and pound force (US unit).   The reading is always shown as the belt frequency in Hz on the display of the belt tension measuring device. The intuitive graphic menu is visualized on the high-contrast display of the belt tension measuring device in six different languages. Up to 750 data records can be stored in the memory of the belt tension measuring device. The belt tension measuring device is delivered completely ready for use. The scope of delivery includes the handheld device, the standard sensor with gooseneck, a magnetic holder, batteries and operating manual. To increase the flexibility during the measurement, the following items are optionally available to the belt tension meter: an external sensor head with a spiral cable, a device hard case, a frequency mallet and a tripod.   Areas of application     The belt tension measuring device can measure the belt tension of timing belts, ribbed belts and V-belts. Belt tension is an important parameter for the maintenance, installation, setting up, and repair of the belt drives. The belt tension has to be controlled regularly over the entire running time and adjusted if necessary to ensure the maximum possible service life of all the machine components in the periphery of the belt. It is very important that the preload force is selected according to the forces to be transmitted.   Principally here applies, the greater the forces to be transmitted and the greater the belt speed during operation, the greater the preload forces that must be selected. At the same time, it is necessary to ensure that the belt tension is not set too high, since otherwise the bearings of the belt drives can be affected and, at the same time, the belt-wear increases which may cause belt cracks. At the same time, too low belt tension can also cause damage when, for example, teeth skipping or the belt slipping occurs. Because of that it is important to determine the belt tension or the preload force with a belt tension measuring device. This may help to significantly reduce the follow-up costs occurring due to the unplanned standstill and downtime caused by the bearing damage or by the defective belts. The use of a belt tension measuring device is therefore suitable for applications in the field of industrial production, motor technology, for stepper motors, in machine and tool construction or also in the area of maintenance and repair.   What is the belt tension force?   Since several forces act on a belt drive, the most important forces on belt drives are named below in order to understand the significance of the belt tension force. The belt connects a drive pulley with a driven pulley. The drive pulley is driven by a motor which generates a torque and transmits it to the drive pulley. The belt transmits this torque in the form of a circumferential force to the driven pulley. The following forces are important.   The circumferential force: The circumferential force corresponds to the effective force to be transmitted by the belt. The circumferential force depends on the applied engine power and thus on the torque as well as on the engine speed and the pulley diameter. In order to maintain the balance of forces, the circumferential force causes the formation of different forces in the strands of the belt. The difference between the forces between the loaded and unloaded runs corresponds to the circumferential force transmitted to the belt.   The frictional force: The frictional force at the drive pulley ensures that the torque of the motor is transmitted via the belt to the driven pulley. At the driven pulley, a usable torque is generated which corresponds to the product of the circumferential force and half the diameter of the driven pulley.   The centrifugal force. The centrifugal force increases with increasing speeds and causes the belt to stretch and thus lose grip. In this case, the centrifugal force acts against the adhesion force.   The pretensioning force: The pretensioning force / span force / belt tension is different under dynamic conditions on the loaded and the unloaded span. In static conditions, the belt tension is identical in both runs. In the static state, the pretensioning force must be set in such a way that under dynamic conditions there is sufficient adhesion to the pulleys to ensure the transmission of power from the belt to the pulley, while at the same time taking into account the centrifugal forces acting on the belt in the operating state. However, the belt tension must not be set too high, as otherwise belt damage and/or bearing damage may occur under load. The correct belt tension must be selected specifically for each belt and the corresponding application. In most cases, belt manufacturers specify the corresponding belt tension in the form of forces or frequencies. A belt tension meter can then be used to accurately determine the required belt tension after installation and before commissioning a belt drive.   Why should you measure the belt tension force?     The measurement of the belt tension is always necessary when machines and systems are to be optimally maintained. A belt drive reaches its maximum service life only if it is designed and adjusted for its use. This means that the belt should be tensioned for the specific application optimally and the pulleys – precisely aligned. With the help of the belt tension measuring device, the strand force can be determined exactly when the belt is under stationary conditions.   Long service life and high performance of the equipment and the machines – is the wish-goal of every user, either company or an individual. In many industries, in particular, in various mechanisms, belts are an important and necessary part. The smallest deviations from the standards may lead to serious consequences, like systems failure, that is why, it is especially important to regularly check the belt tension, since only when this value is absolutely correct and optimal, the best performance may be provided. Not only weaker than necessary tension, but also the tension that exceeds the standards, may cause serious and, which is important, preliminary, degradation of the belt and drop of the performance. This could cause serious machine failures with unplaned downtime and high repairing costs. For example, wrong belt tension in the generator of the car is devastating in both cases and may be dangerous and lead to the complete wear of the mechanisms. Significant costs – is just one of the items in the list of the possible problems that may follow. Even if the belt is not broken, the change in its function does not remain unimportant for the whole system or mechanism, and that is why it is actually one of the priority tasks to keep this issue under control.   To do this is easy with the help of the belt tension meter, which represents a small, but a very useful device which can help the user to determine the belt tension in the system to be controlled and thus, indicate whether the prompt measures should be taken to adjust the tension to the setpoint value. Testing the tension manually remained in the past long time ago, and the best way to determine the tension is to use the device and by means of the calculations get an exact data about the belt tension. The vibrations coming from the belt are not only registered by the belt tension meter, the data are processed after they have been received by the optical sensor, and based on the characteristics of the belt (weight, width, length), the final result is calculated and displayed on the lighted screen (in N and Hz).   The spectrum of application is wide, starting from individual applications in household (various devices and household equipment) or office to industrial fields where it can be used for different conveyors, lifting equipment, elevators, automotive industry or agricultural machines.   The main advantage of the belt tension meter is not only that it helps to detect the faults and prevents failures, it may also be used for checking the correctness of the installation before commissioning. Thus, before the equipment gets started, the check by means of the belt tension meter is a reliable confirmation that the machine will run flawlessly in compliance with the regulations. The data received with the help of the meter may be saved and used as a norm-sample during the regular maintenance checks later.     Technical Specifications   Measuring range 10 ... 900 Hz Accuracy ± (1% of rdg. + 4 digits) Repeatability accuracy   ± 1 Hz Resolution   <100 Hz: 0.1 Hz >100 Hz: 1 Hz Belt length max. 9,999 m Belt mass max. 9,999 kg/m Sensor length 16 cm / 6,2 in Memory   750 measured values 15 sets of 50 measuring points Menu languages   German, English, Spanish, French, Italian, Dutch Power supply 3 x 1.5 V AA batteries Operating conditions 0 ... 50 °C / 32 ... 122 °F; max. 95 % R.H. Storage conditions -20 ... 65 °C / -4 ... 149 °C; max. 95 % R.H. Dimensions 150 x 80 x 38 mm / 5.9 x 3.1 x 1.4'' Weight ca. 200 g / 7 oz incl. batteries     Delivery Scope 1 x Belt Tension Meter PCE-BTM 2000A 1 x Standard sensor head 3 x 1.5 V AA battery 1 x Operating instructions 1 x Carrying bag     Downloads Product Brochure User Manual Software Manual CE Certificate   read more
next page